Saturday, 26 November 2011

Evolution of Dive Lights

Evolution of Dive Lights

Primary lights

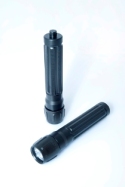
Before going into details, we would first need to separate the primary dive light and the back-up lights aka BULs. The primary needs to have a stronger output that the back up light and needs to have a burn time of the planned total dive, plus reserve. We could say, time and a half to be conservative. On the other hand the BULs, have to offer, combined burn time of twice the total dive time as they’ll be used to exit the cave/overhead environment in the even of a primary light failure. They have to be bright enough not to delay the exit too much.
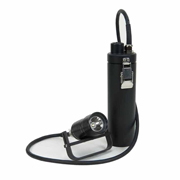
Cave or Tech diving primary light with Goodman handle

Thanks to technology and companies working to keep their customers satisfied, we now have an array of choice for primary and back ups. In house lighting has evolved as well and thanks to this evolution. To let you know, if you didn’t already knew, the primary light used int he early Sheck Exley days, were of tungsten filament with a ‘yellow’ colour all this connected to a motorcycle baterry…Talk about history! I’m glad we are where we are now with light technology. 
When diving in caves you need the brightest light possible, specially if you are exploring a new cave or diving a cave you never dived before. It helps building an ‘image’ of the cave, better than with low-wattage yellowish lights!! So the solution was then, to pimp up (can I say that?) the wattage  getting to the bulb and override the bulb to get a brighter spectrum. The downside really was that by doing so, the bulb failures were common and it was practice to carry two or three even four primary light during long cave dives.
Then the bulb technology kind of helped a bit and brought us the gas-filled bulbs that were higher in color temperature, accepting higher voltage better and mass-produced so cheap!! All what a cave diver really wants: reliable, cheap and accessible.
LED Dive Light
Thanks to the 21st century, we were blessed when the high intensity discharge bulbs (HID) came up, same time as the LED more or less. With new technology comes new prices..yes, HID lights are expensive but for the extra burn time and penetration factor (in the silt, the penetration, in the silt only…perverts!) it outweighs the cost big time.
HID is prefered for primary dive light, due to the tight beam and long rang. Cave diving and more cave exploration takes the diver in zero visibility situation on a regular basis, although the training received does not count on using a super powerful light to get out of the zero viz zone, it is a nice comfort blanket so to speak! When you blow the viz, in some places, not even Darth Vader swish laser beam thingy would set you free…only following the line in touch contact would.
I don’t want to name brands too much in my blog as they don’t really care and no incentive for me what so ever but this one deserves the Diver’s Price of the New Century, I named, Welch Allyn. A bulb dedicated factory who developped HIDs for diving and outdoor market.
LED back-up lights
Today, the output of an HID primary light of let say, 14W will exceed easily the antic halogen 50w bulb and will offer a brighter, ‘whiter’ spectrum (6000K), better for real light condition. Inconvenient of the HID bulb is that they are fragile and cost a fortune today…
When one technology is being replaced by a newer one, usually the prices, of both tend to skyrocket!!! Well, the exception confirms the rule as LED dive lights are hitting the market hard and not more expensive that their predecessor HIDs.
LED or Light Emitting Diodes are the ‘new’ toy in town when talking about dive light. Maybe not ready to replace 100% the Primary diving light market but certainly have kicked out the BULs straight out! The trick the manufacturers are working their heads-off to do, si to focus the beam of the LEDs. Apparently, not an easy fix. BUt as we are talking technology advancement, it won’t take long until we see it take over HIDs primary light.A great plus for the LED is the run time being greater, power consumption is lower and with new battery technology, we could see LEDs really take over.
The first batteries that were used were lead acid or even wet-cell lead acid, from motorcycles. If you needed higher temperature light spectrum, the nickel cadmium batteries were the weapon of choice.
Then came the nickel metal batteries but they didn’t handle very well high discharge rates. With the HID bulb, using only 1 amp, within the discharge rate of the nickel metal battery, the ratio discharge to battery weight accorded perfectly with the 10w HID.
NiMH battery cell
Time spent diving and using these toys helps the industry come with better toys, this where the battery people came up with Lithium Ion or NiMh Nickel Metal Hydride. A NiMH battery can have two to three times the capacity of an equivalent size nickel–cadmium battery.
Together, between light and battery evolution we gained in size, primary lights are now very small and offer a way longer runtime by taking little time to charge… What else could we ask?

Back-Up Lights

LED all the way.  Some say it is a standard for reliable, durable and affordable BULs. So let’s not make it an issue!
Earlier versions were larger than some of today’s primary lights. And because of their nature, standard alkaline batteries are the norm.  When buying a battery pack for you BUL do not get lured by the marketing tactics used by large sharks…or companies I ment to say. Some advertise the ‘extra long lasting’ batteries that are in fact for low power demand and our BULS are high power demand, greedy buggers!!!  Look out for the wattage. Best is to keep those Alkaline coming. But and there is a BUT, quite a big BUT actually! These BULs are BULs so not supposed to be used and as we speak about batteries, it is a good idea to replace the batteries of your BULs once every few months, 6 at the most. As they are tested before every dive (and underwater please!) you can easily say if the output is still good or not. Rechargeable are not recommended because of their chemistry, they need discharge cycle as well as charge cycle, a bit like your PL.
So that’s it then, primary lights are smaller and have more reliable bulbs and longer burn time and BULs are also brighter and offer way more burn time than before. The batteries have done a huge step in the future but if you look, not as much as the bulb technology such as LED. The next step is to offer an HID light with the burn time and robustness of an LED… So before you complain about technology next time, take a look at your dive lights and throw you laptop in the bin!! 
Sidemount Diving Systems

Sidemount Diving Systems

Modular or Sidemount only rig

It is not a fad! It is here to stay! Sidemount diving has been used for decades already and in the harshest environment imaginable. So NO, it is not just a fad.
For the last two years now there’s been a surge with manufacturers to introduce sidemount compatible wings or other BCDs. No blame, just to say that everybody is jumping on the bandwagon, that’s it!
Diver using Sidemount configuration

So far, the only available sidemount-only, equipment was from a major diving manufacturer, that is the Nomad from Lamar Hires, Dive Rite and a ‘smaller’ one, Golem, with the Armadillo designed by Brett Hemphill.
Both had to suit the divers they were mainly addressed to: Florida cave divers. Deep caves, huge passages and some good sidemount caves. I am not going to compare the size of the caves here, it is not what this article is for, but more to share with you, my views of the sidemount scuba diving market as it is today.

Modular Sidemount Systems

When using a modular sidemount system, you have all the advantages of being able to switch from sidemount to backmount, single or double cylinder configuration but you haven’t got the full advantages of enjoying what sidemount is about … Bias you’d say..?? Maybe, yes but let me explain this a bit.
The manufacturers who wants to jump on the bandwagon have to respond to a board of directors and sometimes investors. So their goal in this perspective is very simple: hit the largest audience possible.
How do you do that? Simple! You just need to say, you’re the one who has the last toy in town that everybody wants. But hold on, it’s not just over yet, not only have you got the toy everybody is talking about but you are so nice that you keep the others  in the loop who are not necessarily interested in that toy but would not mind trying something a bit cooler, or just to get closer to the mainstream pack. Pffooo!! That was a mouthful!
Are you with me here?
Because in the end, this is what it is about, SALES!! Isn’t it? So, the larger the audience, the more product you can potentially sell.
Good, now we’ve got the marketing side of things sorted, let’s look closer at the modular sidemount rig.
Cluttered sidemount configuration
It is going to offer way more lift than is needed. When you say more volume, you imply more material, therefore, more drag and less streamline. It is not needed to say that sidemount was invented to pass smaller sections of wet caves, aka sumps. So the smaller your rig, the better.
Because the modular rig has to fit the sidemount and the double backmounted diver, it can’t be as streamlined as we’d like it to be. I can tell you from experience that the cave (as we speak sidemount) takes a beating when a diver needs to negotiate restrictions with a bulky ‘Vagabond’ – not to name the brand :)
One for All does not work!
This is why, here in Mexico, with the experience acquired through decades of diving in, as a friend calls them, ‘velcro caves’, the sidemount system has become a very streamlined, minimalist and user-friendly rig. Let me introduce you to the: sidemount-only rig!

Sidemount Only Rig

Well, I can tell you that I couldn’t wait to arrive at this part of the article, as I was getting bored talking about such a deviation of truth: modular rigs!
As the title says, it is designed for sidemount ONLY and therefore has no drawback on using it … for … sidemount only! :D
Since the early stages of sidemount, few manufacturers have found a large enough market to spend the $$$ on a production line to bring up something viable.
I can say now and lots of you know as well, that today, this time has ended and we all can enjoy sidemount-only rigs directly off the shelves. Between the Razor Sidemount System, the UTD Z-Wing and harness, the Kameleont, the Easy harness and so on and so forth.
Note that between these units, there is one common attribute: the harness.
Sidemount Only Rig
For this purpose designers/inventors had to shed the BCD style rig to a less bulky and more rugged type of construction. I heard from explorer and inventor of the Razor sidemount system, Steve Bogaerts, that he went through many OPV valves during his explorations while using modular rigs, not really adapted to ‘real’ sidemount caves.  From a Buoyancy Compensator Device, we are now talking about TCD or Trim Compensator Device, a huge leap into perfecting the techniques in buoyancy control while scuba diving.
On top of that, minimalist sidemount equipment allows you to fine tune the weight needed, therefore, helps for BTP*.
If you dive in cold water using a dry suit and with steel cylinders, it is also important to keep in mind the redundancy of such a system. Dual bladder is preferred. If on the other hand you dive in warm water using aluminium cylinders, then a single cell bladder will be a necessity while a very minimum amount of lead will be required to hold a safety stop at 15ft/5m.
Some of the fixtures on a modular harness are not really of use in advanced sidemount diving. I think of the door handles, used to clip the bottom part of the cylinders. While using steel tanks it may work … not really, but they use it in North Florida, so can’t bitch too much about them!
In conclusion, I’d say with the ever-increasing interest in sidemount diving and equipment coming onto the market, there is an increase in the number of divers wanting to go sidemount diving. Before you launch yourself in the quest for a sidemount rig, talk to your instructor. Make sure you choose your sidemount instructor carefully, ask about their experience in sidemount diving and what type of sidemount diving they do, at what level.
Photo credits: Diver using Sidemount configurationCluttered sidemount configuration are from a diver not trained in sidemount scuba diving and using a modular sidemount rig while the photo Sidemount Only Rig depict a trained sidemount diver using a Sidemount Only Rig.

By Jason Renuox

Delayed Surface Marker Buoys

Delayed Surface Marker Buoys

surface marker for ocean diving

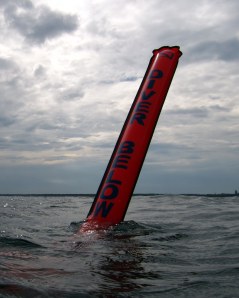
Deep sea diving or should I say open water diving? In any cases divers will need to be able to signal their position and communicate with the surface by using a surface marker buoy aka SMB, DSMB, sausage or even  a bolb!!
At a beginner’s level, surface suport is just the boat captain and maybe his crew, just waitng in the drift to see ‘where’ the client-divers are going to surface from their dive. Pretty basic you’d say…
It should be, as long as it is agreed before the dive, that an SMB must be used and the boat crew know the type and eventualy color of the surface markers in use within that group of recreational divers.
But on the other hand, we’d have the more experienced diver, possibly a technical diver, even a sidemount technical diver ;)  who absolutely need surface support for his or her safety. During your technical diving class with Essential Scuba Training, you will learn how to deploy safely an SMB.
Surface Marker

On tech dives, it is common to have two Surface Marker Buoys (SMBs). One orange and one yellow.  It is also down to communication between divers and the surface.
Why two colors you’d say? Simplification of communication is key to avoid confusion. So there is a positioning SMB, the red one and an emergency marker that is bright yellow. Remarque that I don’t mention lift bag as a surface marker. If you use a lift bag it is because you are lifting something from the bottom of the sea, looting wrecks or salvaging something.
So if you think about the importance of communication and diver safety, you’ll realise how important this singular piece of diving equipment is!
When you are ready to buy your marker buoy, think about the type of diving you do and project to do in a near future so to make a sustainable choice. On a trimix dive for example, you must carry top of the line, life support equipment, consider your SMB as one of them. Be aware of the ‘surface marker buoy’ wannabees as they will sell you anything but the kind of marker you need or would need to use during your dives. And please, don’t go for the two-sided SMB with a red and yellow side…nothing worth to create confusion and brake the communication between you and your surface safety team.
Marker Buoys - red & yellow
There are different types of DSMB:
  • open ended (with small weight to keep the opening submerged to prevent the air escaping)
  • open ended self sealing buoys (as the buoy ascends it seals the neck at the bottom of the buoy, a funnel)
  • sealed, with an oral inflation valve and a pressure relief valve;
  • sealed, with a built in air supply and a pressure relief valve.
The safety buoy must be of strong construction, not plastic, no plastic suicide clips or anything that looks ‘fragile’. Keep it super simple! KISS principle applies all over your scuba diving activity, remember it. 
I hope this will help you decide what type of sausage you want to eat…sorry, it’s lunch time!! Ask any questions before purchasing your Surface Marker, it will be my pleasure to share any information with you.
In a future post, I will talk in detail about how to deploy safely a marker buoy.
 
By Jason Renuox

Maximum Operating Depth

Maximum Operating Depth (part 2)

scuba cylinders markings

As I said earlier, it is vital to analyse your diving cylinders prior to go out diving. It is so important that there is a sort of ‘accepted’ way of doing it while keeping the KISS principle. Keeping it Super Simple so easy to read and identify as to avoid any confusion.
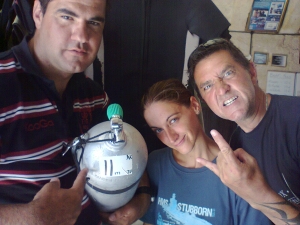
Unless you have a Marking Identification Team like this one, be careful!! :)

Where to put the tank labels?

Once it is establish what kind of gas you have and what Maximum Operating Depth or Targeted Operating Depth is accepeted by the team, it is time to take out your marking tape and the PERMANENT marker!!! I insist on the fact the marker has to be permanent for obvious reasons!
Let’s analyse the next series of images as they speak for a thousand words…
Marking is team work and responsibility.
Depending on the dive conditions, labels have to be readable from any position.
So here you have an idea of what deco cylinder labeling is all about.
When technical or/and mix gas diving in open ocean, confusion is the last thing we want to get to.
During the NOTOX switch things must go smoothly and without confusion or assumption… As we say, assumption is the Mother of ALL f&*%@ ups!
A clear protocol and pre-dive check list must be followed. I know some of you reading this blog entree may not agree with where I put my deco tank labels and that’s fine. What works for me does not necessarily works for you.
When I came up with placing the neck label on the oposite side of the bottom one, I was sure it was making more sense to me and it has so far proven very good. SO good that it has been approved by a very famous IT  from IANTD who I have a lot of respect for. Nothing new, just improved ideas! :)
Thanks Paul V Toomer from Dive Matrix Malta.
Essential Scuba Labeling
Notice the piece of art I did with Photoshoops, it is a greate tool to pass along a message with a picture.
In this image it is easy to see what I am talking about. The neck label and the bottom label are in opposite places and easy to read in big characters.
Marking Bottom part of dive/deco cylinder
With just the MOD and a personal mark to identify that, this it is indeed your own tank, this label states only what’s important.
Marking Neck of deco/dive cylinder
And for the neck, we keep things as simple and clear to read, for the self identification and also to allow for positive switch if buddy is on the right hand side. In heavy current and strong seas it is not easy nor safe to move around during deco.
Note that the diver here, placed the percentage of the mix as well as the MOD. Small enough characters not to create confusion during NOTOX switch.
Hope you found this information useful and will feel interested in posting a comment or two.
Talk to you soon!

By Jason Renuox

Maximum Operating Depths

Maximum Operating Depths  (Part 1)

Cylinder labels – What to do?

Scuba diving is still claiming victims. Sometimes, reading newspapers, it is possible to hear about the diver’s oxygen cylinder that ran out. If you read this blog, you are probably a diver and therefore know exactly what I am talking about!
With today’s demand for advanced diver training these journalist could never be so far from the truth. Oxygen cylinders are dangerous, a bit like a loaded weapon. If mishandled, it is not a question of ‘if’ but ‘when’ will it kill!? Unless…
As soon as divers enter in the Technical diving realm, they will carry along a variety of gasses either to extend their bottom time or to help during the decompression or ascent phase of the dive.

All you need is this!
Scuba diving cylinders are to be filled with air most of the time, or and that is becoming more and more popular, anything else than air. Not only it is important to get your ‘air’ fills in reputable filling stations but if the facility is filling also other breathing gasses, such as Nitrox or Trimix, it is important if not vital to analyse the scuba cylinder you are given. Do not assume, guess or gamble!
In Tech dive centers it is a moral obligation as well as a safety guideline to label correctly any cylinders that does contain gas with other content than 21% oxygen and 79% nitrogen.* Pure oxygen must be marked as OXYGEN!!!
In order to warn the novice diver that some cylinders are not for his or her use but are either oxygen rich or lean mixtures. Be aware!! 
So let’s have a look at how and what sort of labels/stickers we’ll use to label our cylinders and what will be written on these ‘reminders’.
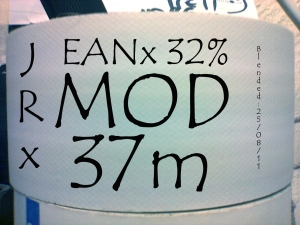
For divers using EANx mix in their bottom phase cylinders, it is recommended to write the Maximum Operating Depth (MOD) and a personnal identification to differentiate your cylinders from other team members using the same gas.
It would go as follow:
  • for a Nitrox 32 @1.5P02=37m
  • Diver’s nickname JRx
1.5 PO2 is used for this exemple as an MOD – I would have 1.4 as a TOD

Less is more!
By just giving the maximum depth this cylinder is safe to breath, I limit the confusion and potential danger of breathing the wrong gas at the wrong depth.
If taken to an extrem it can lead to confusion, look at this exemple:

Confusing?
 On the exemple above we must also admit a bit of Photoshop creation and not the use of a permanent marker!
So again, less is more!

We must fear the mishandling of labels and other marking system. More recently a tragic accident occurred during an exploration dive in the famous Wakulla Spring in Florida. A very experience diver and instructor died due to label error and gas switch at the wrong depth. Because this why divers die, switching at the wrong depth with the wrong gas.
Mix Gas Mixing Pannel
If you are diving using trimix blends, you MUST make sure your cylinders are properly and clearly marked. Some trimix blends hold a content of oxygen breathable from the surface to depth with an MOD defined by the PPO2 the diver accepts to expose him or herself. On the other hand, to dive below the 60m range, it will be required to use what is called a hypoxic trimix blend. This denomination simply means that the gas in the cylinder is only breathable at depth and DANGEROUS if breathed at the surface due to a too little oxygen content. Some very deep trimix blends don’t have enough O2 to support life, while at the surface.
In the Part 2 of this article, we will be discussing, where we should place these markings on the cylinders. Stay Tuned!

By Jason Renuox

Drt suits can be used every day

After spending the summer in Swedish waters I have now returned to Koh Tao and the swimming pool like conditions of the water. One of the experiences I have brought with me is the benefits of dry suit diving.

Tropical Drysuit Diving

The past month everyone have been looking at me rather odd and I can hear whispers behind my back. Ready to jump in 29 degree water I stand before them in my dry suit.
So why would I ever go trough all this trouble?
If you ever have been diving in tropical waters during your vacation then you probability did it in a pair of board shorts and a rash guard. But as soon as you decide to stick around for a while longer then quickly you will realize the water is not that warm any more. You will be coming up from the dives shivering. When i first started diving I did it in my boardies, a few weeks later and 3mm shorty felt OK. The weeks went by and so did my tolerance for the cold. An upgrade to a full 3mm wet suit felt fine for some time, but then the monsoon came. Bye bye 3mm and hello 5mm full wet suit, gloves and hood. It kept me warm. But now I dive in my Fusion Tech shell dry suit from Whites.
When I ask other divers what their take on dry suits are most say ice diving or winter back home. And this is true, if you want to dive stay warm and have a good dive you need a dry suit. But there is so much more to it. Diving around the world in your dry suit is like carrying a multi-tool in your pocket. You can use it everywhere and all the time. It all depends on what you wear under the shell. Right now I use a thin wool undergarment to transport any perspiration away from me. When I´m in the water the suit it self does not provide any insulation. If I feel warm I would let some of the air which is acting like an insulator. If I feel to cold I just add some. If I decide to go back to Sweden for Christmas all I do is to add an extra layer of isolation. As a technical diver I keep all my diving configuration the same all the time. The benefit from this is that facing any emergency I act the same way every time, not different for each configuration style. Even in warm waters the duration and depth usually is greater than recreational dives which affects the thermal exposure. A wet suit will compress during descent and thermal protection will decrease with it. Descending in a dry suit you would add air to equalize the suit. Water will cool down your body approximately 25 times faster, in a dry suit you are not at all affected by this in the same way.
Especially now during monsoon season I clearly see the benefits of diving dry. On the dive boats after the first dive people come out of the water with blue lips seeking shelter near the compressor or engine room covered in all the towels they can find. Meanwhile I stand on deck with the zipper open venting out some air. With a big smile across my face I am ready for the second dive.