Tuesday 31 July 2012

Tony is a free radical


Oxygen Toxicity – what’s all that about then?

If you’re a nitrox (or enriched air, EANx, or whatever else you want to call it) diver you’ll have learned about oxygen toxicity during your course. A couple of simple rules are laid out as gospel truth and with them comes an (almost) certain knowledge that you’ll stay safe.
As a recreational nitrox diver, you’re told to keep your PO2 below 1.4ata throughout the dive and introduced to the concept of “the pressure T”:

From that, you can cover up any one and see the formula for the other:

So… if you want to know what your PO2 is for a particular mix and depth combination:

Or, if you wanted to know the “best mix” – the mixture with the most oxygen (which is physiologically active – that is, used by the body so it doesn’t have an effect on decompression times or no decompression limits) and the least inert gas (nitrogen for nitrox divers, nitrogen and/or helium for trimix divers) for a specific depth it works like this:

As a recreational nitrox diver, that’s more-or-less all you need to know. You’ll have learned about the CNS Clock when you did your nitrox course… but you’ll have learned – either in the course or by experience – that as a recreational diver it’s pretty difficult to approach any of those limits if you follow the 1.4ata rule.

As a technical diver, things are a bit different.

The first main difference is that we don’t always stick to 1.4ata as a PO2 limit. For the bottom portion of the dive we usually do (though some agencies teach a limit of 1.5ata, reduced by 0.05 for each “stressor” – e.g. cold or adverse weather, which brings us UK divers back to the 1.4 anyway), but for decompression we extend that limit to 1.6ata.
I’ll explain, next week, a bit about why that’s the case – and why it’s considered safe to do so – but thought a bit of a recap/explanation of oxygen toxicity was a good place to start (and it followed on nicely from last night’s DSAT Tec 40 lectures!). So, here comes the science bit:

The discovery of oxygen toxicity

All the way back in 1878 a French man named Paul Bert published a book called La pression barometrique, in which he took a scientific approach to studying the way animals react to increased pressures. It’s pretty grim reading; dogs convulsing for 24 hours before finally dying, for example – but it fundamentally turned biology (and specifically our understanding of respiration) on its head. Until Bert, we’d thought respiration happened as a process of combustion – burning, in simple terms. By increasing the amount of oxygen – more specifically, by increasing the PO2, which can happen by increasing either FO2 or P – it was thought that this “combustion” in the lungs would accelerate and in doing so effectively burn away the lungs… leading to death. Bad news if you’re the test subject!
Bert researched (two other French researchers named Regnault and Reiset had speculated) the premise that this isn’t the case at all. He discovered (and most importantly proved) that the effect of that increased pressure was due not to the pressure, but to the “tension at which oxygen is maintained in the various atmospheres” (Lorrain Smith, 1899). In doing so, he discovered the principle which you learned in your nitrox diver course – that keeping your PO2 within set limits is the way to dive safety.
He also began to have a good hard think about why that might be the case. If the theory of combustion was right, then convulsions were hard to explain. Physical damage to the lungs was expected – and post-mortem examinations of the test animals failed to show any such damage. The final nail in the coffin as far as the combustion theory, for Bert, was a point of common sense – if an increase in oxygen results in an increase in combustion, then the diver should get hotter. This didn’t happen; Bert was convinced there had to be another explanation.

Oxygen as a toxin

If combustion didn’t explain the deaths he was getting so adept at causing, then something else must.. and the symptoms of convulsions (identical in appearance to grand mal epileptic seizures) were very similar to those associated with poisoning or tetanus – and it’s that fact that led him to suspect that oxygen must be acting as an “agent toxic to the nervous system”. More grisly experiments later (taking blood from an animal already convulsing and injecting that blood into a healthy animal!) and he’d come to a second conclusion that we still base our understanding on today: oxygen doesn’t produce “a toxin” in the way other chemicals do (some anti-cancer drugs, for example, are broken down in the liver and produce a toxic byproduct, which is then carried in the blood – giving that blood to another person would also transfer the toxins) but acts directly on the nerves.
And thus was born the theory of oxygen toxicity: Oxygen, in too high a “tension” (PO2) acts directly on nervous tissues in the same way as certain toxins. It can cause symptoms including visual disturbances, ear disturbances, nausea, twitching, irritability and dizziness (VENTID) but most commonly the symptom we see first is convulsions as the nervous system is simply unable to repair itself at a sufficient rate.

Pulmonary Oxygen Toxicity

Lorrain Smith, in 1899, realised that if Bert’s work was correct it was hugely unlikely (or, in science speak, “a priori improbable” – doesn’t that sound fancy?!) that this toxic action of oxygen would affect only the nerves. In particular, he felt that the lungs would almost certainly suffer some form of effect – an idea backed up by the fact that medical science had, by now, learned that putting people on 100% oxygen (at normal atmospheric pressure) and then leaving them there for a while had a tendency to cause pneumonia and then death. Something had to be happening in the lungs.
Some more grisly experiments followed (mostly on mice this time) which showed that the effect wasn’t caused by oxygen encouraging bacterial or microbial growth (bugs!) in the lungs. Instead, the lungs were filled with a solution which appeared to have seeped out of the cells forming the walls of the alveoli themselves – a solution which caused inflammation, the closing of air passageways, respiratory distress and (again) death.
What Lorrain Smith had discovered came to be known as pulmonary oxygen toxicity, and is quite different from the CNS toxicity Bert discovered. In effect the person (or animal) drowns slowly as the lungs fill themselves with liquid. It acts slowly, over a period of several hours, and occurs at relatively low (0.6ata or higher) PO2s – high PO2s do cause it too, but the CNS effects manifest sooner and mask it.
Even for technical divers, Pulmonary Oxygen Toxicity isn’t generally considered too high a risk (though we’ll talk about tracking Oxygen Tolerance Units, OTUs) in a later post.

The body’s natural defences

What Bert didn’t know at the time was a whole bunch of science about how the nervous system works, the chemicals involved in its function, and the way it handles damage. Since then, science has come a long way. We now understand the breakdown of oxygen into water (by mixing with hydrogen in a process chemists call a reduction reaction, to form H2O) in much more detail than Bert did.
During oxygen’s breakdown (from O2 to O, in order to bond with an H2) free radicals are produced. You’ll have neared these mentioned in adverts for everything from moisturiser to shampoo and green tea; the process of breaking down oxygen happens in every cell (other than red blood cells) in the human body and free radicals affect every part of us.

Al is a free radical

“Free radicals” is, in essence, a fancy name for a molecule which has a bit missing and really, really wants to fill that gap – so it wanders off and rips bits off other molecules in order to do so. Imagine being at TGI Friday’s with a group of friends and ordering food… and then Al turns up. You’re going to lose food, whether you like it or not.
As those free radicals are produced, defensive enzymes in the body (an enzyme is a special chemical which makes a reaction happen faster or more easily, and so encourages things to happen that might otherwise not – in this case, the conversion of free radicals to “normal” molecules) fight the damage. Using our Al analogy, that’s seeing him come in the door and ordering another portion of boneless wings so that when he nicks half of the first lot you still have enough. The enzymes have fancy names like superoxide dismutases and peroxidases, and they’re helped out by antioxidants (green tea and red wine!) but you can think of them as the bar staff and waiters/waitresses; two teams that work together doing slightly different jobs to achieve the same goal (making sure you’re left full and satisfied even after Al’s stolen most of your hot sauce and left you with a plate full of celery).

Too much of a good thing

The body’s normal repair, building and maintenance processes repair the damage free radicals cause. They’re a natural part of breathing, eating and moving, so it makes sense that they body would be able to cope with some of them. There’s only so much the repair mechanisms can do, however – no matter how fast you order those wings, if there are three Al’s you’re in trouble.

Oxygen toxicity in a nutshell

In a nutshell, then, you can view oxygen toxicity like this:


About the author: Kevin is a PADI Master Instructor, DSAT Tec Trimix Instructor, TDI Advanced Trimix Instructor, IANTD Instructor Trainer and IART CCR Instructor. He’s been diving professionally for more than a decade and has been fortunate enough to dive in many of the world’s most famous technical dive destinations.
Monday 23 April 2012

Side Mounts Diving

Diving Sidemount  

The Natural Way of Diving


Diving sidemount means you take one or two cylinders and place them on either side of your body, rather than mounting them on your back.
Sidemount equipment has been the preferred choice for cave divers. It is now becoming very popular for many recreational divers, including wreck divers & technical divers. Personally I have found that diving sidemount with one or two cylinders is more enjoyable and gives me greater freedom.

Why I use Sidemount equipment

 Buoyancy control is better and a more streamlined profile reduces drag which makes fining and moving through the water much more efficient. This reduces air consumption resulting in longer dive times.
There is a much greater comfort level because the sidemount harness and equipment is custom fitted to each individual. This accommodates divers of all shapes and sizes.
Much easier for divers with any disabilities or back problems because you carry the cylinders separate from your harness .Once in the water you attach your cylinders negating the need to carry cylinders from the kiting up area to the dive site.
Safer option in terms of air management as you have an easier access to your cylinder valve.
One harness and BCD does it all. The same sidemount equipment is used for more advanced types of diving.
Can My Buddy Still Use Standard Equipment
Yes .All you need to do is note the differences in equipment setup on your pre dive check.

The Hollis SMS 50 review 2012


The long awaited arrival of the Hollis SM50 finally came to an end with some help from Hollis and Hollis UK,  Kelvin Richards and his team including PADI regional Manager Richard Howes,, Still currently unreleased Till June with only a few test models existing in the world, I was honoured to be one of the first to test the new sleek unit. Which I found to be a brilliant unit.. I got given the unit like it would come out the box,, with a few Easy changes I like to do to any unit for the way I Side mount.. (Although this unit comes ready to go) I like a continues bungee,, fixed D rings ect..

The Hollis SM50 is the new, sleeker smoother, and more streamlined ‘sidemount only unit. Unlike the SMS 100 the SMS 50 is aimed at the recreational market of SM not the technical sidemount diving. I did dive it in the shallows of Capernwray with my dry-suit steel 10s and ali 80s,,
The SMS 100 (the multipurpose unit and big brother to the SM50) is the unit I choose to do my technical sidemount diving on, and is also great for recreational sidemount diving too.

The new design and low profile of the SMS 50 wing and harness makes for an INCREDIBLY comfortable, streamlined, and easy to use unit underwater,, it is a smooth unit that is small and supportive unit.. I went in to the cock pit of the plane with ease and threw the escape window with ease.. Hovering around in all orientation was easy, all my finning techniques where easy, with the help due to the less drag,, even when fully inflated had little drag unlike the RAZOR which when inflated seems to be like Turtle Shell creating drag.. There has been a lot of thought gone into this unit even the little weight pouches which are great..

Hollis has seemingly taken over the sidemount market for me having dived a lot of the other units on the market, I will be using Hollis all the way..

 Thank You Tony Cooper (UK)
www.divesidemounts.com

Saturday 26 November 2011

Evolution of Dive Lights

Evolution of Dive Lights

Primary lights

Before going into details, we would first need to separate the primary dive light and the back-up lights aka BULs. The primary needs to have a stronger output that the back up light and needs to have a burn time of the planned total dive, plus reserve. We could say, time and a half to be conservative. On the other hand the BULs, have to offer, combined burn time of twice the total dive time as they’ll be used to exit the cave/overhead environment in the even of a primary light failure. They have to be bright enough not to delay the exit too much.
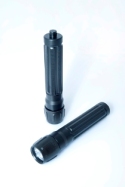
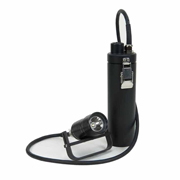
Cave or Tech diving primary light with Goodman handle

Thanks to technology and companies working to keep their customers satisfied, we now have an array of choice for primary and back ups. In house lighting has evolved as well and thanks to this evolution. To let you know, if you didn’t already knew, the primary light used int he early Sheck Exley days, were of tungsten filament with a ‘yellow’ colour all this connected to a motorcycle baterry…Talk about history! I’m glad we are where we are now with light technology. 
When diving in caves you need the brightest light possible, specially if you are exploring a new cave or diving a cave you never dived before. It helps building an ‘image’ of the cave, better than with low-wattage yellowish lights!! So the solution was then, to pimp up (can I say that?) the wattage  getting to the bulb and override the bulb to get a brighter spectrum. The downside really was that by doing so, the bulb failures were common and it was practice to carry two or three even four primary light during long cave dives.
Then the bulb technology kind of helped a bit and brought us the gas-filled bulbs that were higher in color temperature, accepting higher voltage better and mass-produced so cheap!! All what a cave diver really wants: reliable, cheap and accessible.
LED Dive Light
Thanks to the 21st century, we were blessed when the high intensity discharge bulbs (HID) came up, same time as the LED more or less. With new technology comes new prices..yes, HID lights are expensive but for the extra burn time and penetration factor (in the silt, the penetration, in the silt only…perverts!) it outweighs the cost big time.
HID is prefered for primary dive light, due to the tight beam and long rang. Cave diving and more cave exploration takes the diver in zero visibility situation on a regular basis, although the training received does not count on using a super powerful light to get out of the zero viz zone, it is a nice comfort blanket so to speak! When you blow the viz, in some places, not even Darth Vader swish laser beam thingy would set you free…only following the line in touch contact would.
I don’t want to name brands too much in my blog as they don’t really care and no incentive for me what so ever but this one deserves the Diver’s Price of the New Century, I named, Welch Allyn. A bulb dedicated factory who developped HIDs for diving and outdoor market.
LED back-up lights
Today, the output of an HID primary light of let say, 14W will exceed easily the antic halogen 50w bulb and will offer a brighter, ‘whiter’ spectrum (6000K), better for real light condition. Inconvenient of the HID bulb is that they are fragile and cost a fortune today…
When one technology is being replaced by a newer one, usually the prices, of both tend to skyrocket!!! Well, the exception confirms the rule as LED dive lights are hitting the market hard and not more expensive that their predecessor HIDs.
LED or Light Emitting Diodes are the ‘new’ toy in town when talking about dive light. Maybe not ready to replace 100% the Primary diving light market but certainly have kicked out the BULs straight out! The trick the manufacturers are working their heads-off to do, si to focus the beam of the LEDs. Apparently, not an easy fix. BUt as we are talking technology advancement, it won’t take long until we see it take over HIDs primary light.A great plus for the LED is the run time being greater, power consumption is lower and with new battery technology, we could see LEDs really take over.
The first batteries that were used were lead acid or even wet-cell lead acid, from motorcycles. If you needed higher temperature light spectrum, the nickel cadmium batteries were the weapon of choice.
Then came the nickel metal batteries but they didn’t handle very well high discharge rates. With the HID bulb, using only 1 amp, within the discharge rate of the nickel metal battery, the ratio discharge to battery weight accorded perfectly with the 10w HID.
NiMH battery cell
Time spent diving and using these toys helps the industry come with better toys, this where the battery people came up with Lithium Ion or NiMh Nickel Metal Hydride. A NiMH battery can have two to three times the capacity of an equivalent size nickel–cadmium battery.
Together, between light and battery evolution we gained in size, primary lights are now very small and offer a way longer runtime by taking little time to charge… What else could we ask?

Back-Up Lights

LED all the way.  Some say it is a standard for reliable, durable and affordable BULs. So let’s not make it an issue!
Earlier versions were larger than some of today’s primary lights. And because of their nature, standard alkaline batteries are the norm.  When buying a battery pack for you BUL do not get lured by the marketing tactics used by large sharks…or companies I ment to say. Some advertise the ‘extra long lasting’ batteries that are in fact for low power demand and our BULS are high power demand, greedy buggers!!!  Look out for the wattage. Best is to keep those Alkaline coming. But and there is a BUT, quite a big BUT actually! These BULs are BULs so not supposed to be used and as we speak about batteries, it is a good idea to replace the batteries of your BULs once every few months, 6 at the most. As they are tested before every dive (and underwater please!) you can easily say if the output is still good or not. Rechargeable are not recommended because of their chemistry, they need discharge cycle as well as charge cycle, a bit like your PL.
So that’s it then, primary lights are smaller and have more reliable bulbs and longer burn time and BULs are also brighter and offer way more burn time than before. The batteries have done a huge step in the future but if you look, not as much as the bulb technology such as LED. The next step is to offer an HID light with the burn time and robustness of an LED… So before you complain about technology next time, take a look at your dive lights and throw you laptop in the bin!! 

Sidemount Diving Systems

Sidemount Diving Systems

Modular or Sidemount only rig

It is not a fad! It is here to stay! Sidemount diving has been used for decades already and in the harshest environment imaginable. So NO, it is not just a fad.
For the last two years now there’s been a surge with manufacturers to introduce sidemount compatible wings or other BCDs. No blame, just to say that everybody is jumping on the bandwagon, that’s it!
Diver using Sidemount configuration

So far, the only available sidemount-only, equipment was from a major diving manufacturer, that is the Nomad from Lamar Hires, Dive Rite and a ‘smaller’ one, Golem, with the Armadillo designed by Brett Hemphill.
Both had to suit the divers they were mainly addressed to: Florida cave divers. Deep caves, huge passages and some good sidemount caves. I am not going to compare the size of the caves here, it is not what this article is for, but more to share with you, my views of the sidemount scuba diving market as it is today.

Modular Sidemount Systems

When using a modular sidemount system, you have all the advantages of being able to switch from sidemount to backmount, single or double cylinder configuration but you haven’t got the full advantages of enjoying what sidemount is about … Bias you’d say..?? Maybe, yes but let me explain this a bit.
The manufacturers who wants to jump on the bandwagon have to respond to a board of directors and sometimes investors. So their goal in this perspective is very simple: hit the largest audience possible.
How do you do that? Simple! You just need to say, you’re the one who has the last toy in town that everybody wants. But hold on, it’s not just over yet, not only have you got the toy everybody is talking about but you are so nice that you keep the others  in the loop who are not necessarily interested in that toy but would not mind trying something a bit cooler, or just to get closer to the mainstream pack. Pffooo!! That was a mouthful!
Are you with me here?
Because in the end, this is what it is about, SALES!! Isn’t it? So, the larger the audience, the more product you can potentially sell.
Good, now we’ve got the marketing side of things sorted, let’s look closer at the modular sidemount rig.
Cluttered sidemount configuration
It is going to offer way more lift than is needed. When you say more volume, you imply more material, therefore, more drag and less streamline. It is not needed to say that sidemount was invented to pass smaller sections of wet caves, aka sumps. So the smaller your rig, the better.
Because the modular rig has to fit the sidemount and the double backmounted diver, it can’t be as streamlined as we’d like it to be. I can tell you from experience that the cave (as we speak sidemount) takes a beating when a diver needs to negotiate restrictions with a bulky ‘Vagabond’ – not to name the brand :)
One for All does not work!
This is why, here in Mexico, with the experience acquired through decades of diving in, as a friend calls them, ‘velcro caves’, the sidemount system has become a very streamlined, minimalist and user-friendly rig. Let me introduce you to the: sidemount-only rig!

Sidemount Only Rig

Well, I can tell you that I couldn’t wait to arrive at this part of the article, as I was getting bored talking about such a deviation of truth: modular rigs!
As the title says, it is designed for sidemount ONLY and therefore has no drawback on using it … for … sidemount only! :D
Since the early stages of sidemount, few manufacturers have found a large enough market to spend the $$$ on a production line to bring up something viable.
I can say now and lots of you know as well, that today, this time has ended and we all can enjoy sidemount-only rigs directly off the shelves. Between the Razor Sidemount System, the UTD Z-Wing and harness, the Kameleont, the Easy harness and so on and so forth.
Note that between these units, there is one common attribute: the harness.
Sidemount Only Rig
For this purpose designers/inventors had to shed the BCD style rig to a less bulky and more rugged type of construction. I heard from explorer and inventor of the Razor sidemount system, Steve Bogaerts, that he went through many OPV valves during his explorations while using modular rigs, not really adapted to ‘real’ sidemount caves.  From a Buoyancy Compensator Device, we are now talking about TCD or Trim Compensator Device, a huge leap into perfecting the techniques in buoyancy control while scuba diving.
On top of that, minimalist sidemount equipment allows you to fine tune the weight needed, therefore, helps for BTP*.
If you dive in cold water using a dry suit and with steel cylinders, it is also important to keep in mind the redundancy of such a system. Dual bladder is preferred. If on the other hand you dive in warm water using aluminium cylinders, then a single cell bladder will be a necessity while a very minimum amount of lead will be required to hold a safety stop at 15ft/5m.
Some of the fixtures on a modular harness are not really of use in advanced sidemount diving. I think of the door handles, used to clip the bottom part of the cylinders. While using steel tanks it may work … not really, but they use it in North Florida, so can’t bitch too much about them!
In conclusion, I’d say with the ever-increasing interest in sidemount diving and equipment coming onto the market, there is an increase in the number of divers wanting to go sidemount diving. Before you launch yourself in the quest for a sidemount rig, talk to your instructor. Make sure you choose your sidemount instructor carefully, ask about their experience in sidemount diving and what type of sidemount diving they do, at what level.
Photo credits: Diver using Sidemount configurationCluttered sidemount configuration are from a diver not trained in sidemount scuba diving and using a modular sidemount rig while the photo Sidemount Only Rig depict a trained sidemount diver using a Sidemount Only Rig.

By Jason Renuox

Delayed Surface Marker Buoys

Delayed Surface Marker Buoys

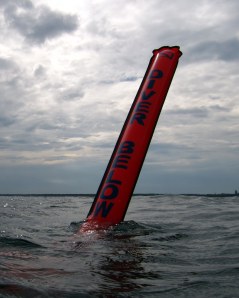
surface marker for ocean diving

Deep sea diving or should I say open water diving? In any cases divers will need to be able to signal their position and communicate with the surface by using a surface marker buoy aka SMB, DSMB, sausage or even  a bolb!!
At a beginner’s level, surface suport is just the boat captain and maybe his crew, just waitng in the drift to see ‘where’ the client-divers are going to surface from their dive. Pretty basic you’d say…
It should be, as long as it is agreed before the dive, that an SMB must be used and the boat crew know the type and eventualy color of the surface markers in use within that group of recreational divers.
But on the other hand, we’d have the more experienced diver, possibly a technical diver, even a sidemount technical diver ;)  who absolutely need surface support for his or her safety. During your technical diving class with Essential Scuba Training, you will learn how to deploy safely an SMB.
Surface Marker

On tech dives, it is common to have two Surface Marker Buoys (SMBs). One orange and one yellow.  It is also down to communication between divers and the surface.
Why two colors you’d say? Simplification of communication is key to avoid confusion. So there is a positioning SMB, the red one and an emergency marker that is bright yellow. Remarque that I don’t mention lift bag as a surface marker. If you use a lift bag it is because you are lifting something from the bottom of the sea, looting wrecks or salvaging something.
So if you think about the importance of communication and diver safety, you’ll realise how important this singular piece of diving equipment is!
When you are ready to buy your marker buoy, think about the type of diving you do and project to do in a near future so to make a sustainable choice. On a trimix dive for example, you must carry top of the line, life support equipment, consider your SMB as one of them. Be aware of the ‘surface marker buoy’ wannabees as they will sell you anything but the kind of marker you need or would need to use during your dives. And please, don’t go for the two-sided SMB with a red and yellow side…nothing worth to create confusion and brake the communication between you and your surface safety team.
Marker Buoys - red & yellow
There are different types of DSMB:
  • open ended (with small weight to keep the opening submerged to prevent the air escaping)
  • open ended self sealing buoys (as the buoy ascends it seals the neck at the bottom of the buoy, a funnel)
  • sealed, with an oral inflation valve and a pressure relief valve;
  • sealed, with a built in air supply and a pressure relief valve.
The safety buoy must be of strong construction, not plastic, no plastic suicide clips or anything that looks ‘fragile’. Keep it super simple! KISS principle applies all over your scuba diving activity, remember it. 
I hope this will help you decide what type of sausage you want to eat…sorry, it’s lunch time!! Ask any questions before purchasing your Surface Marker, it will be my pleasure to share any information with you.
In a future post, I will talk in detail about how to deploy safely a marker buoy.
 
By Jason Renuox

Maximum Operating Depth

Maximum Operating Depth (part 2)

scuba cylinders markings

As I said earlier, it is vital to analyse your diving cylinders prior to go out diving. It is so important that there is a sort of ‘accepted’ way of doing it while keeping the KISS principle. Keeping it Super Simple so easy to read and identify as to avoid any confusion.
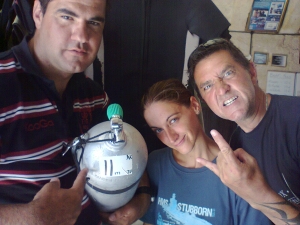
Unless you have a Marking Identification Team like this one, be careful!! :)

Where to put the tank labels?

Once it is establish what kind of gas you have and what Maximum Operating Depth or Targeted Operating Depth is accepeted by the team, it is time to take out your marking tape and the PERMANENT marker!!! I insist on the fact the marker has to be permanent for obvious reasons!
Let’s analyse the next series of images as they speak for a thousand words…
Marking is team work and responsibility.
Depending on the dive conditions, labels have to be readable from any position.
So here you have an idea of what deco cylinder labeling is all about.
When technical or/and mix gas diving in open ocean, confusion is the last thing we want to get to.
During the NOTOX switch things must go smoothly and without confusion or assumption… As we say, assumption is the Mother of ALL f&*%@ ups!
A clear protocol and pre-dive check list must be followed. I know some of you reading this blog entree may not agree with where I put my deco tank labels and that’s fine. What works for me does not necessarily works for you.
When I came up with placing the neck label on the oposite side of the bottom one, I was sure it was making more sense to me and it has so far proven very good. SO good that it has been approved by a very famous IT  from IANTD who I have a lot of respect for. Nothing new, just improved ideas! :)
Thanks Paul V Toomer from Dive Matrix Malta.
Essential Scuba Labeling
Notice the piece of art I did with Photoshoops, it is a greate tool to pass along a message with a picture.
In this image it is easy to see what I am talking about. The neck label and the bottom label are in opposite places and easy to read in big characters.
Marking Bottom part of dive/deco cylinder
With just the MOD and a personal mark to identify that, this it is indeed your own tank, this label states only what’s important.
Marking Neck of deco/dive cylinder
And for the neck, we keep things as simple and clear to read, for the self identification and also to allow for positive switch if buddy is on the right hand side. In heavy current and strong seas it is not easy nor safe to move around during deco.
Note that the diver here, placed the percentage of the mix as well as the MOD. Small enough characters not to create confusion during NOTOX switch.
Hope you found this information useful and will feel interested in posting a comment or two.
Talk to you soon!

By Jason Renuox